Léo Alonzo
Data Scientist Junior
Build Smarter Bots with Copilot Studio: Intention Detection Made Easy

Microsoft’s Copilot Studio, the successor to Bot Framework Composer, is transforming how we build chatbots, providing a no-code interface for creating conversational agents that respond intelligently to user requests. With a drag-and-drop GUI, even those without extensive coding skills can design complex bot interactions. In this guide, we’ll explore how Copilot Studio can be leveraged to create a bot that detects user intentions, specifically distinguishing between movie and music queries.
1. Context
Copilot Studio is a no-code service by Microsoft designed to make chatbot development accessible and intuitive. It works via “topics”, which are sets of bot interactions defined through blocks in a graphical user interface. Each topic contains specific logic for the bot, making it easy to structure and visualize conversational paths.
In our case, the goal is to create a bot capable of distinguishing whether a user is interested in movies or musics and then dispatching their query accordingly.
Our data consist of two CSV files: one with movie descriptions and one with music lyrics. To understand what the user wants, we’ll build an experience with two types of functionality: one using Conversational Language Understanding (CLU) and another using Generative AI directly within Copilot Studio.
2. Implementing Information Search
Before starting the detection and implementation, it’s important to set up an Agent in Copilot Studio. This involves creating the base for your bot, which serves as the foundation for all further configurations.
In Copilot Studio, navigate to “New Agent”. Here, you can name your copilot, create a description, and describe how the agent should react (using a prompt system). You can also define the knowledge, but for now, we will leave that empty.
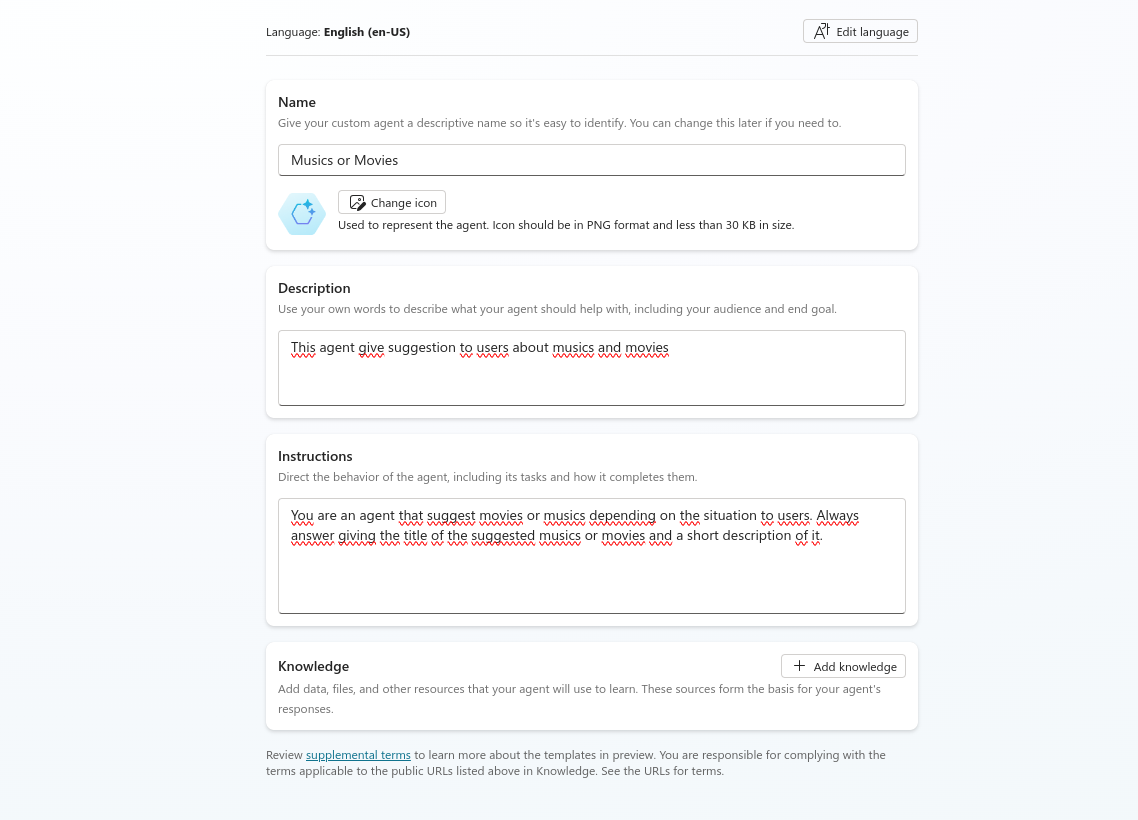
Integrating Knowledge Bases
In the knowledge tab, we imported our two files and created a short description for both of them.
Note: For more advanced information search functionality, it’s possible to connect to other services like Azure AI Search or even our own custom API endpoints. These connections enable richer interaction capabilities, like action-triggered requests to external data sources, but for this article, we will not use them.

To facilitate an efficient user interaction, we begin by pre-creating three topics:
- Movie Topic
- Music Topic
- Fallback Topic (when we can’t detect the user’s intention)
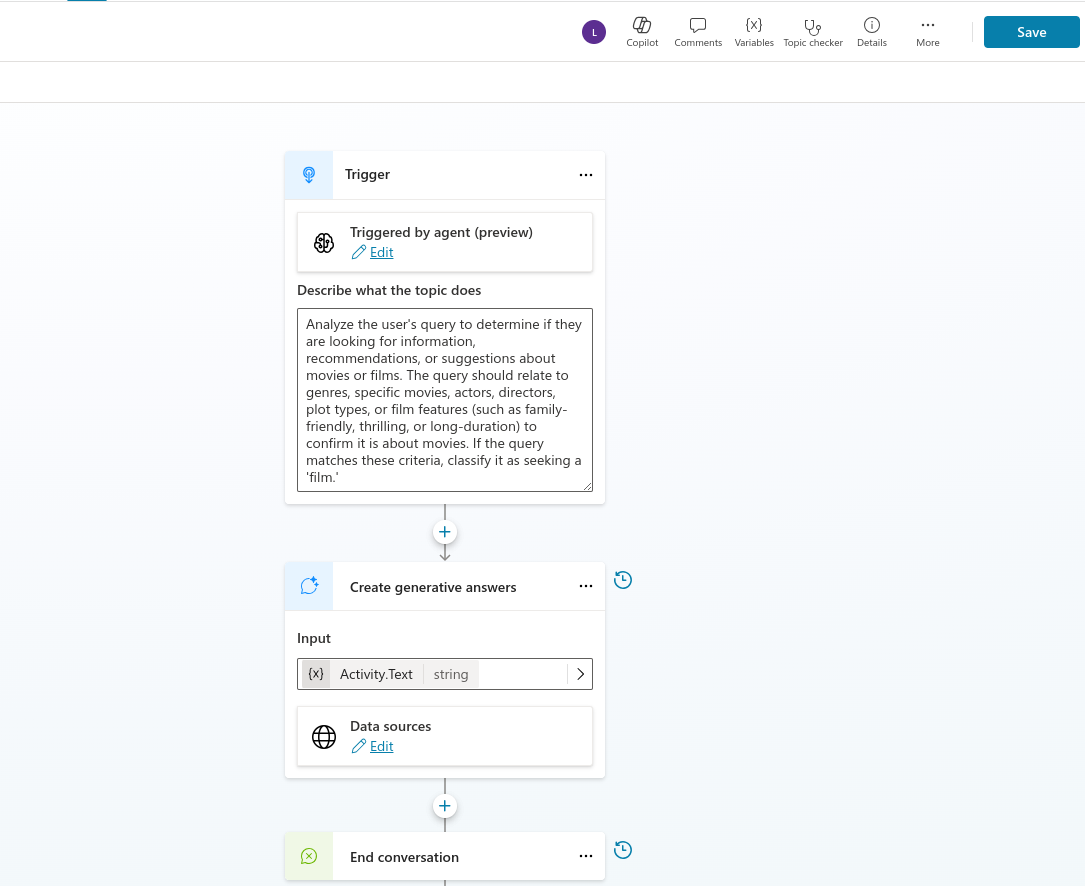
Here is an example of the topic to detect movies. It starts with a trigger (for now, it is not configured to detect anything). Then we have the generative answers connected to the knowledge source and the input text (stored by default in Activity.Text)..
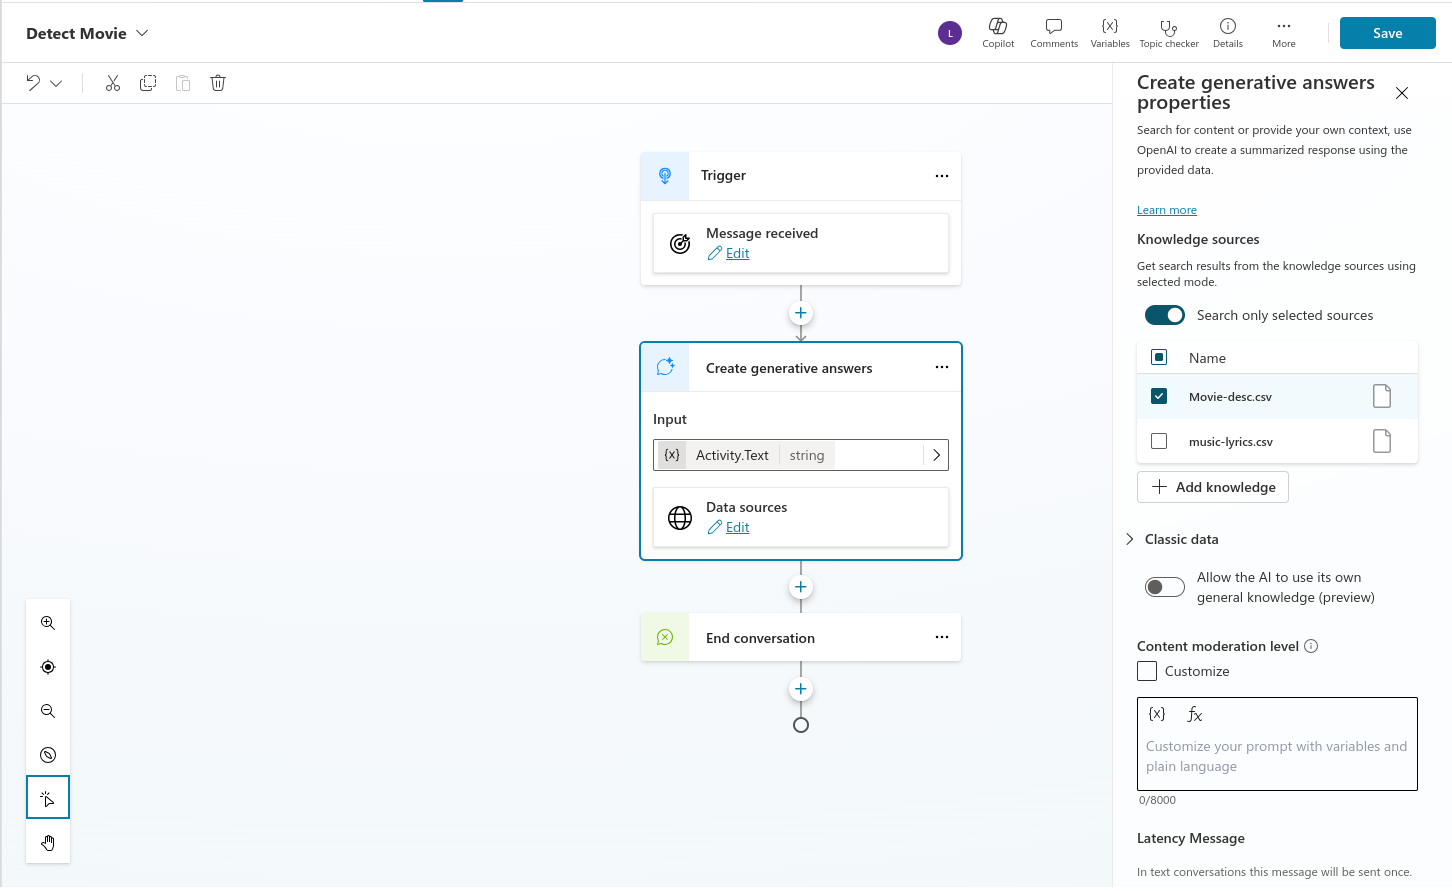
3. Detecting Intention with CLU
To detect user intentions using Azure Conversational Language Understanding (CLU), we need to create some Azure resources:
Step 1. Create an Azure Resource Group:
Start by setting up the Azure resource group that will group the other resources that we will create.
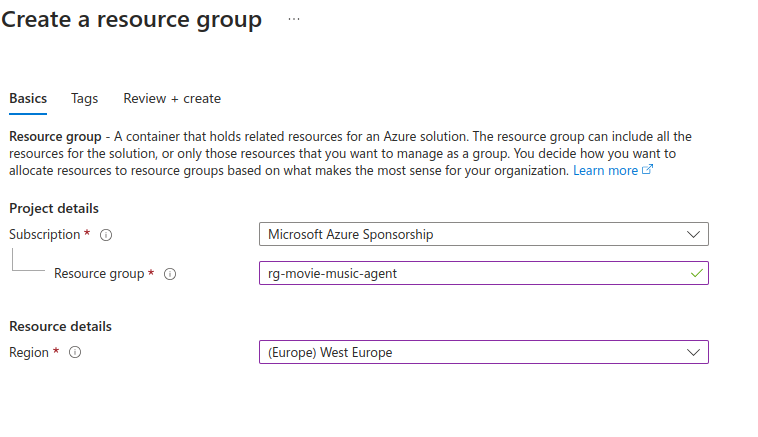
Step 2. Create a Language Resource:
Next, add a specific language resource to enable understanding and classification of user requests. This resource is necessary to access Language Studio and create a project in it.
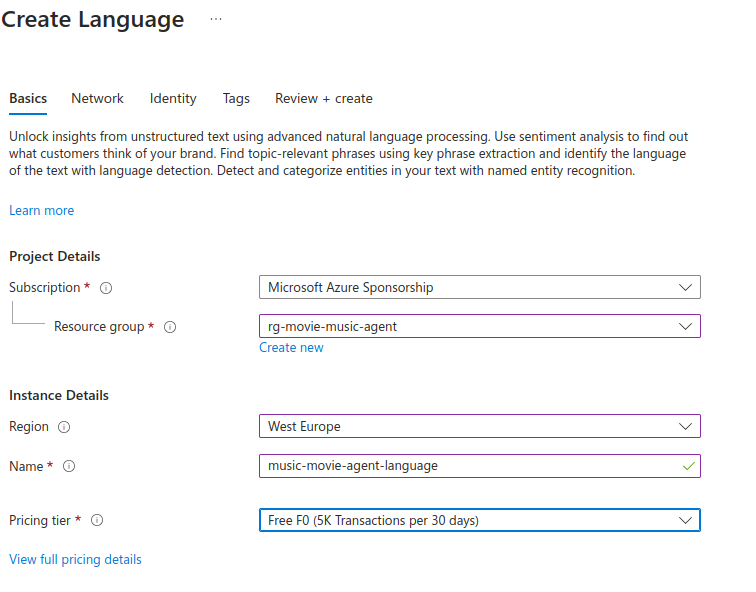
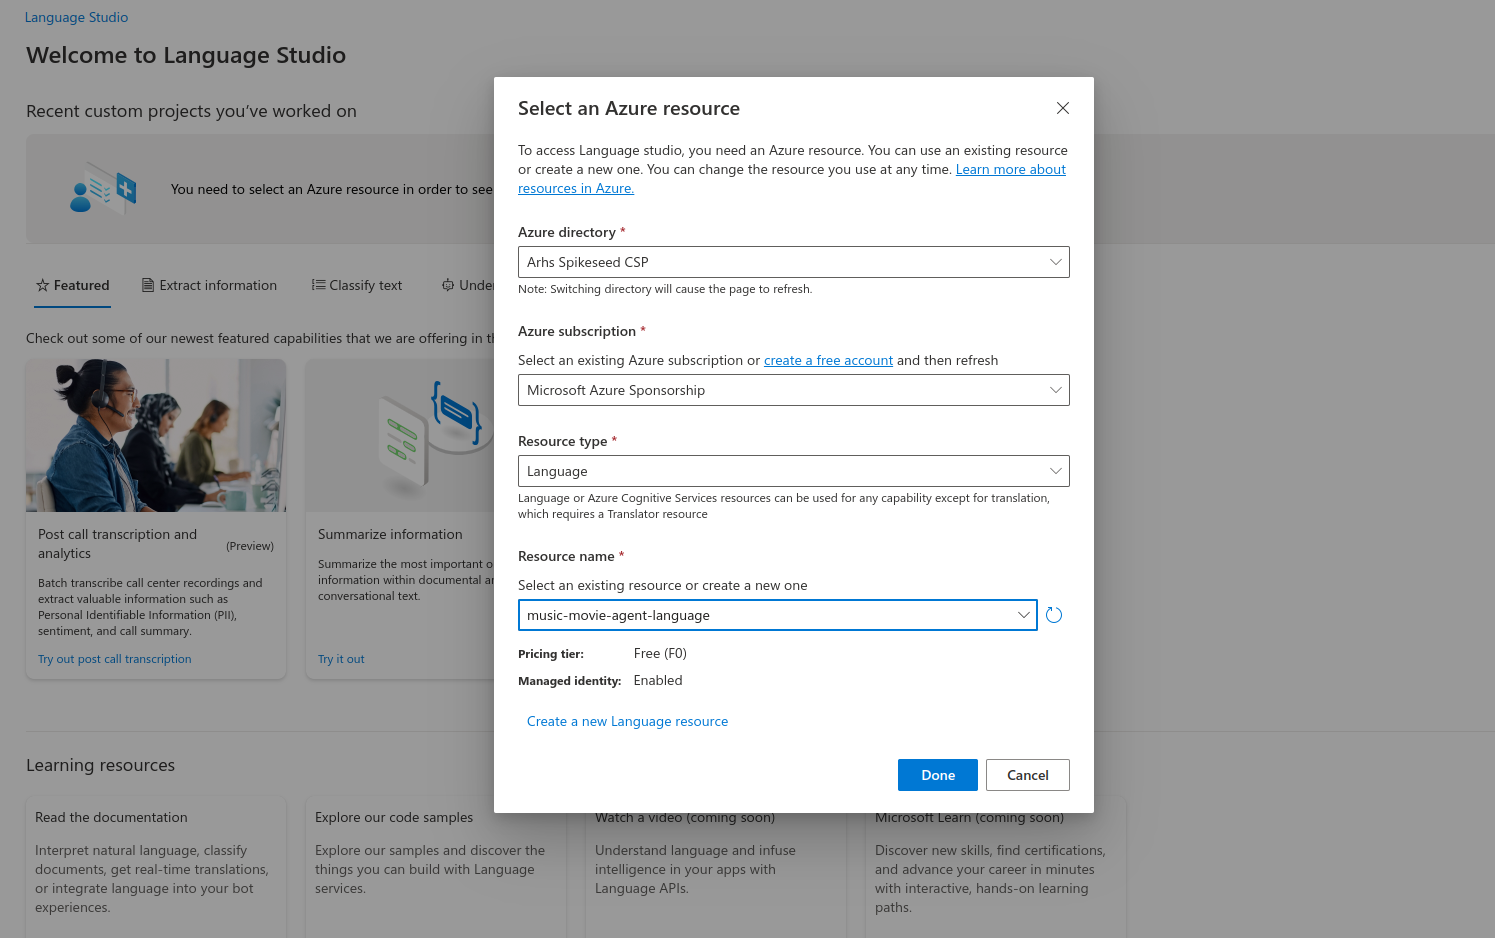
Step 3. Go to Language Studio:
Connect Language Studio to the created Language Resource. Language Studio is an Azure service where we can do various types of NLP project (such as summarization, translation or classification).
Step 4. Create a new CLU project:
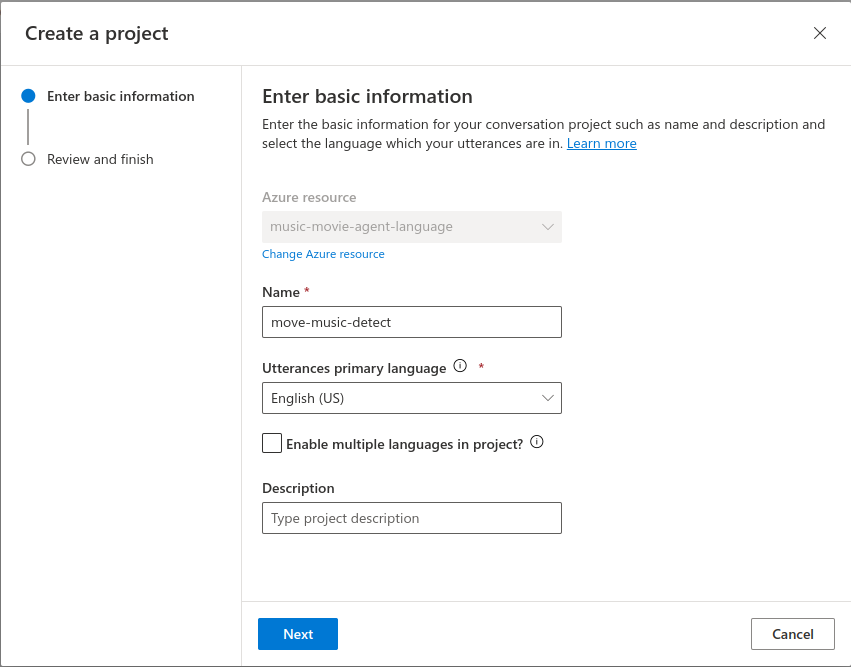
In Language Studio we create a new CLU project. In this project we will define the different classes (intent in our case) that we want to classify. This is where we will create the training dataset, train the model, validate and evaluate the model and finally deploy it.
Step 5. Train a Text Classification Model:
Using the Azure language resource, create and train a text classification model to recognize whether a user query relates to movies or music. This model will help detect the user’s intention and can also recognize specific entities within the text. The dataset in our case is created by hand in the GUI.
Note: You can also upload your own dataset, but you will need to create an utterance file (json file with a specific format). The format of this utterance file can be found in the azure documentation.

Now that we have our dataset, we can train our model and then export it to Copilot Studio. Azure also provides tools to test and validate the recognition of these entities to ensure accuracy.
Step 6. Add CLU in Copilot Settings:
Once CLU is ready, integrate it into Copilot by adding it in the settings.
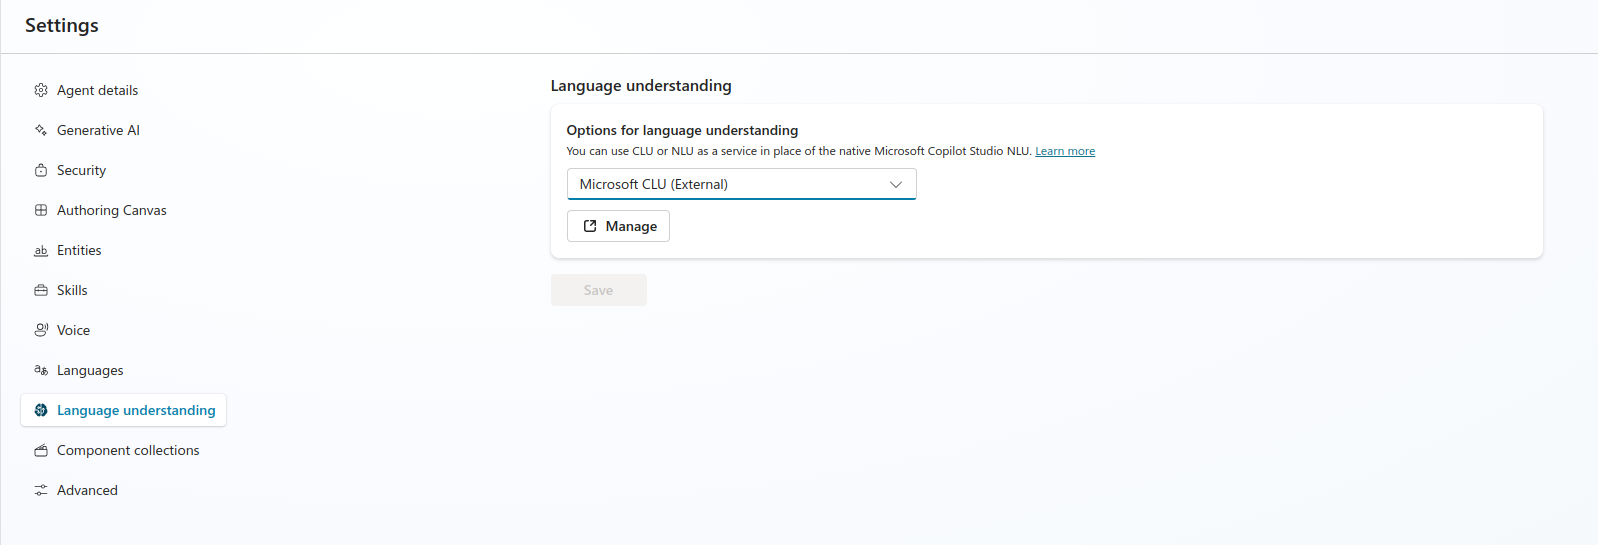
Once added, it will ask for a few details like the project name and the deployed model name. A button labeled “Add Topics and Entities from Model Data” will appear. This allows us to export the names of entities and intents managed by our deployed model.
Step 7. Add CLU Triggers to a Topic:
Create triggers based on CLU detection that determine which topic (movie, music, or fallback) to route the user to. This can be done while exporting the CLU in Step 5.
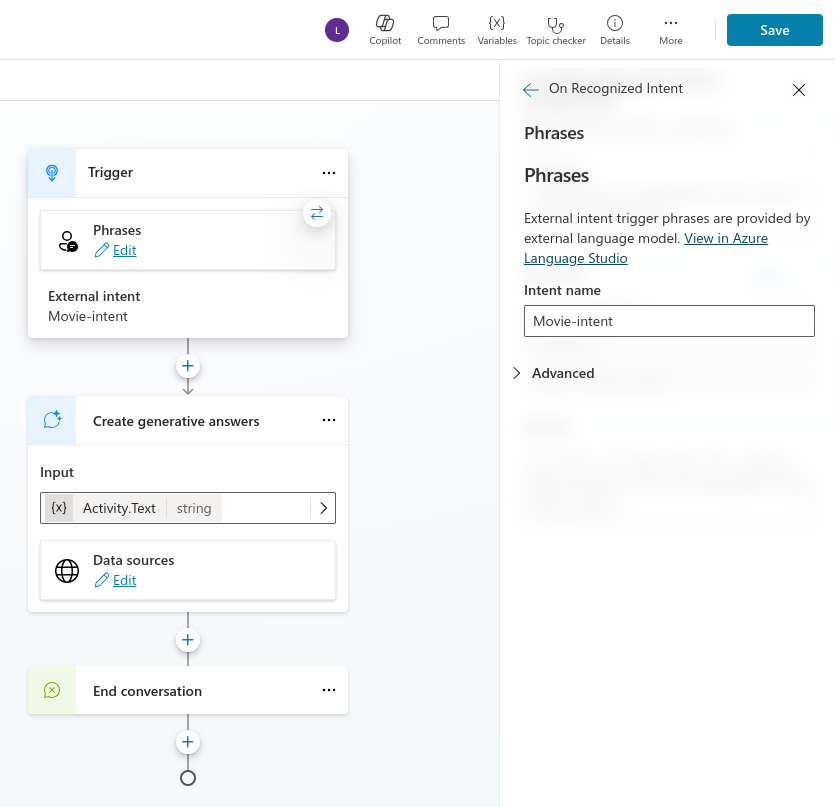
Now we can test our agent:
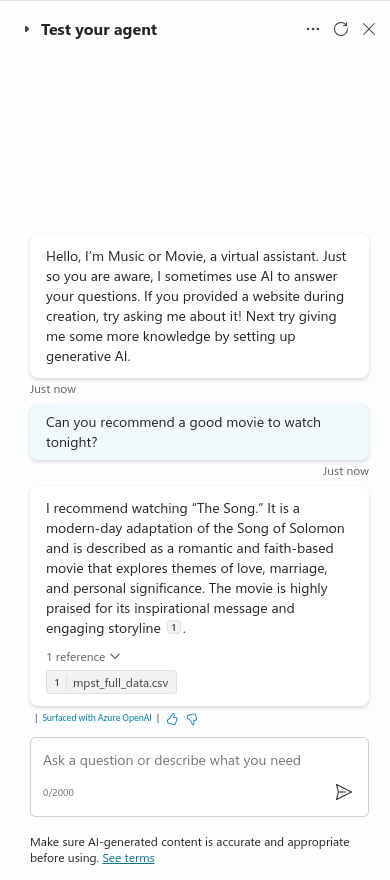
Limitation
While CLU is a handy tool for intention detection, it has some limitations:
-
Manual effort required to label training data: this can be time-consuming, especially for large datasets. CLU models can also need periodic retraining to stay effective especially if the dataset included in the knowledge is frequently updated.
-
Costs of Azure services for hosting and training CLU models can be significant. In contrast, Generative AI in Copilot Studio is easier to implement without additional Azure costs.
4. Detecting Intention with Generative AI
In opposition to CLU, Copilot Studio allows us to use Generative AI to interpret user requests. This functionnality speed up the process of detection as we don’t need to make data labelling.
Step 1. Activate GenAI in Settings:
Start by enabling Generative AI in Copilot’s settings to use its built-in language model for understanding user requests.

Step 2. Set Up Triggers Using Prompt Engineering:
Use prompt engineering to guide the model in understanding when a user is talking about movies versus music. This approach involves crafting specific prompts to get the most relevant answers for each user query. Here is the example with the prompt used for the movie topic:
Finally, we can test the bot to validate whether the generative AI properly distinguishes between movie and music requests, based on the prompts we engineered.
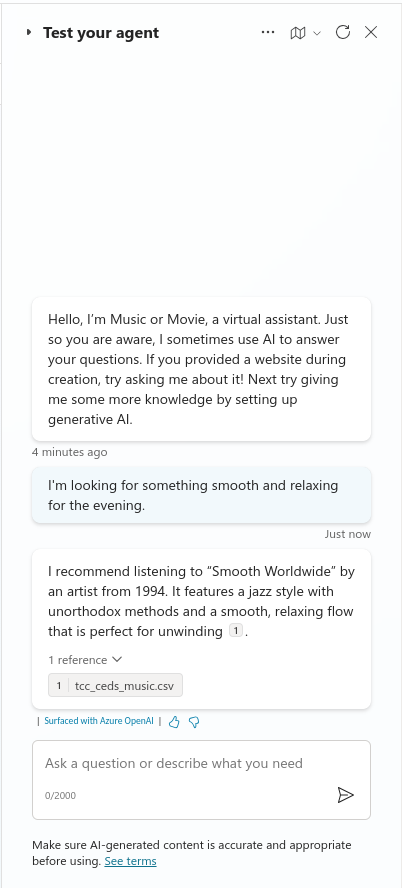
Limitation
Even if the Generative AI is faster to setup than CLU, it comes with his set of limits:
-
Lack of transparency in how the model makes its decision. This can make generative AI difficult to finetune and to understand why a particular response was given.
-
generative AI is less consistent than custom CLU model. Without performance metrics, it’s also challenging to evaluate and track improvements over time thus making it more difficult to maintain.
5. Conclusion
Both CLU and Generative AI have their respective strengths when it comes to intention detection in Copilot Studio. Using CLU involves more setup steps, but it offers greater customization and the ability to measure the performance of the classification model through detailed metrics. Generative AI, on the other hand, is quicker to implement but may sometimes be less consistent and lacks transparency in how decisions are made. Moreover, GenAI doesn’t provide performance metrics, which can make evaluation more challenging.
The choice between CLU and GenAI will ultimately depend on your needs: if you value customizability and performance measurement, CLU might be the better option. If you’re seeking quick setup and implementation, then Generative AI would be a good fit. Regardless of the approach, Microsoft Copilot Studio provides a flexible and powerful environment for building intelligent bots capable of accurately understanding user intentions.
